Getting Started
Welcome! Are you ready to write tests for your Skyrim mods?
Download SkyUnit
First off, download SkyUnit from NexusMods:
You’ll need to download a few dependencies:
- SKSE64 ( core dependency )
- JContainers ( core dependency )
- UIExtensions ( used for the SkyUnit UI )
Create Test
Let’s create a mod from scratch. How does that sound?
And we’ll add a test.
You can optionally add tests to a separate .esp from your mod.
I think most folks will want to do this. So let’s do it!
Create New Mod to Store Tests
In Mod Organizer 2, create an Empty Mod.
Or do this however you normally do it
in your favorite mod manager
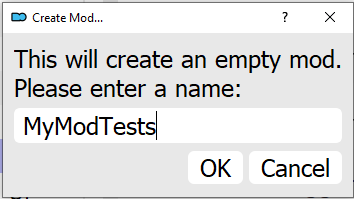
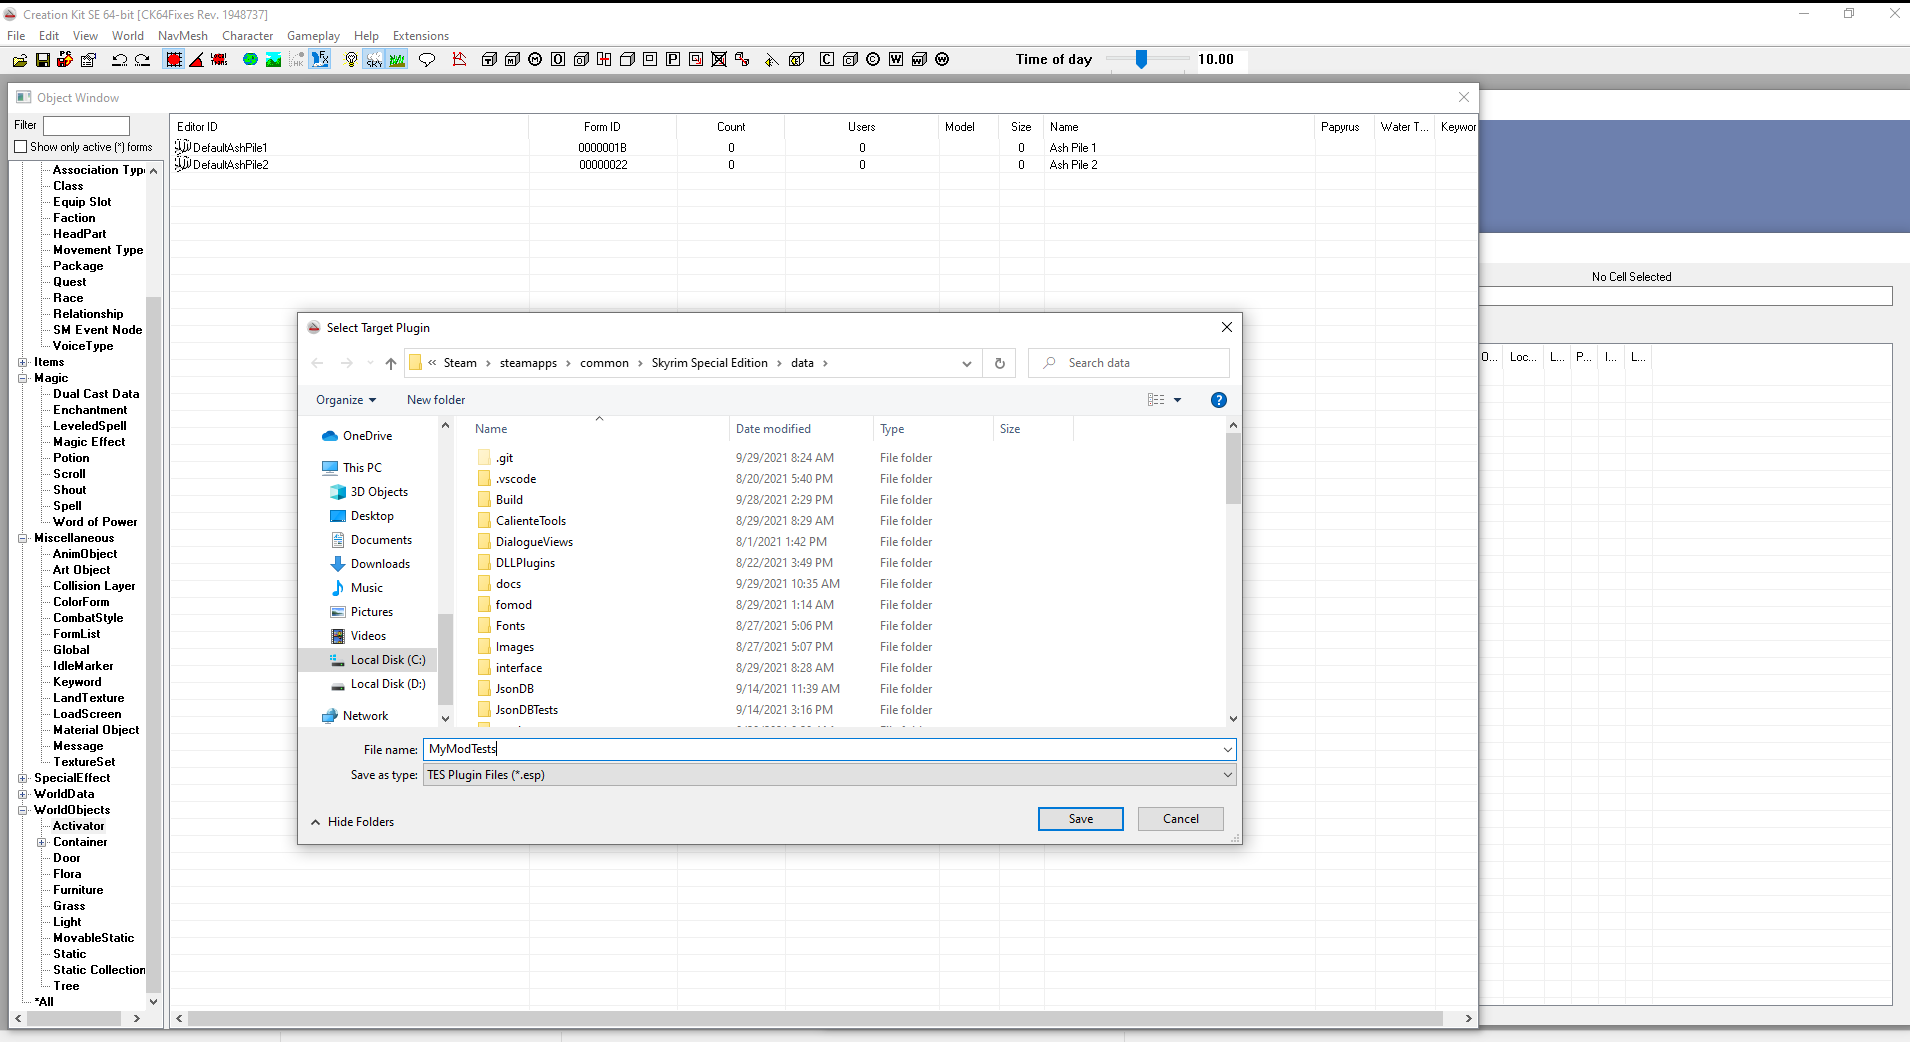
Save a New .esp
Note: you can alternatively save your tests scripts
in your mod’s main.esp, it’s up to you.If you do, your tests will be available to any players who have SkyUnit installed.
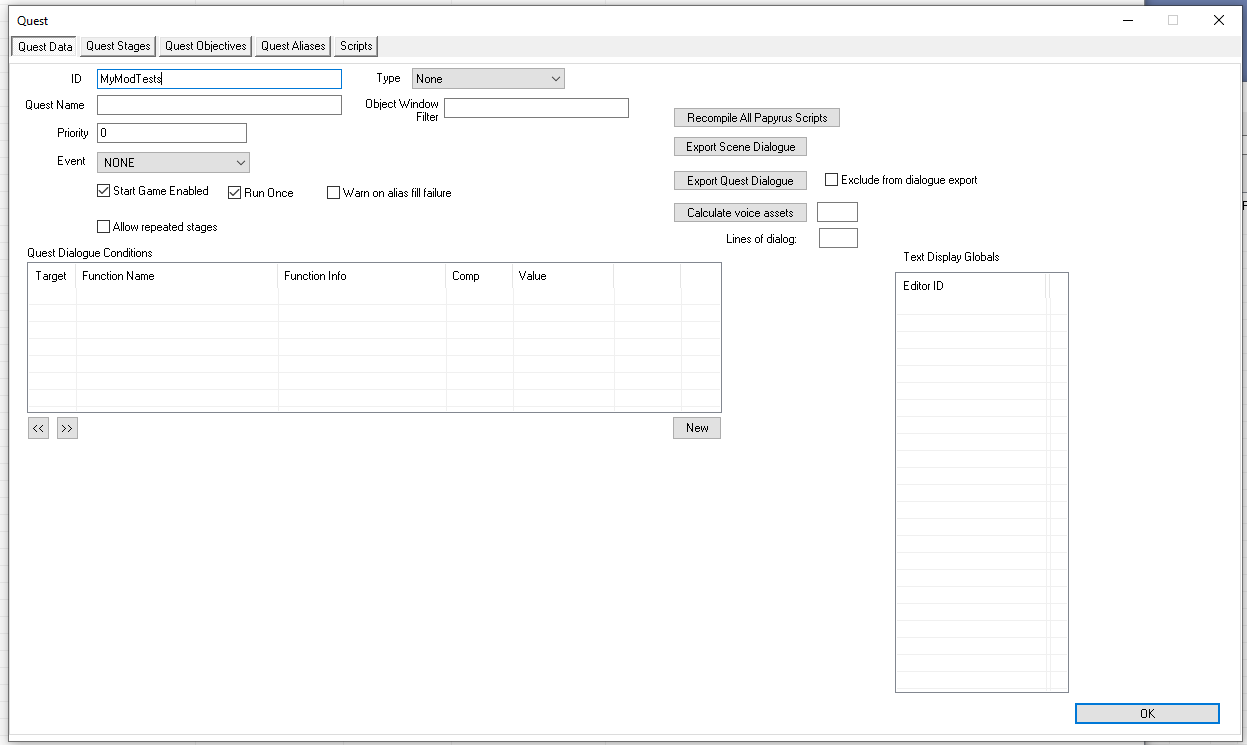
Create a New Quest
Create a quest which will store all of your test scripts.
Every individual script represents a “test suite”.
You can (and should) have multiple scripts.
Don’t add all of your tests into one file.
Make sure that your quest is Start Game Enabled
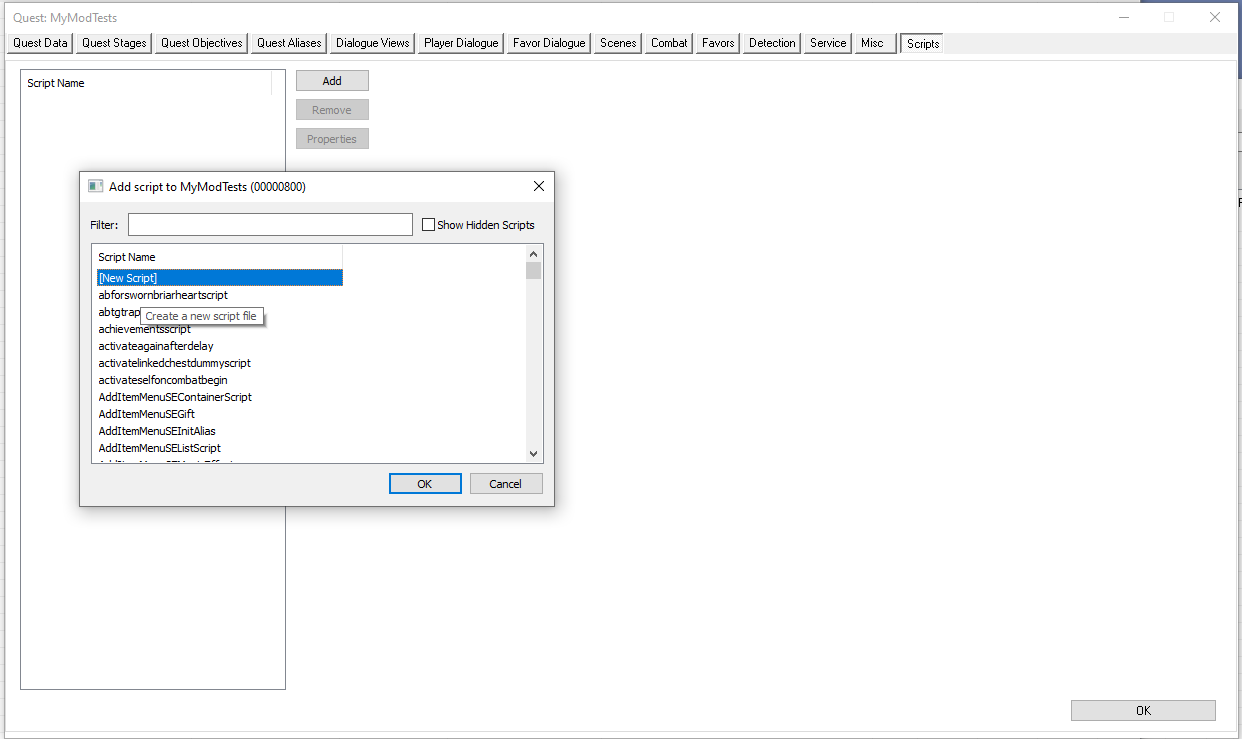
Add a Script to the Quest to store our Tests
Create a new Quest script under the Scripts tab of the Quest.
Note: it must be a Quest script, you cannot use a
Quest AliasReferenceAliasas a test script.
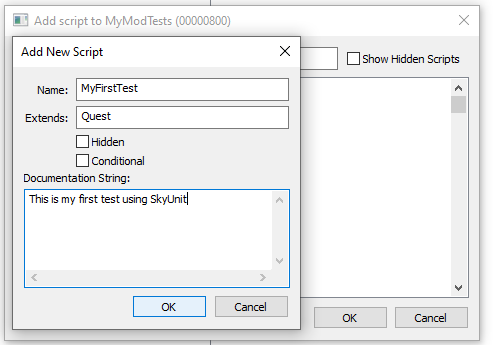
Name Your New Test Script
Reminder: this is just your first test script.
You will want to add more scripts to this Quests as you add more tests for your mod.
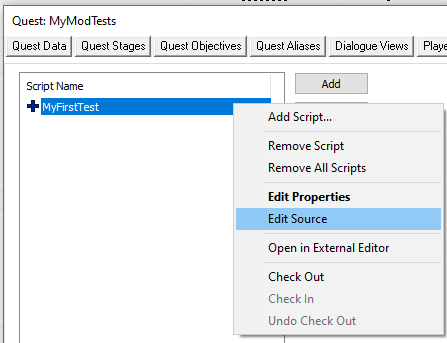
Edit the Source of the Script
Make sure you have SkyUnit installed correctly by updating your script
so that it extends SkyUnitTest instead of extends Quest
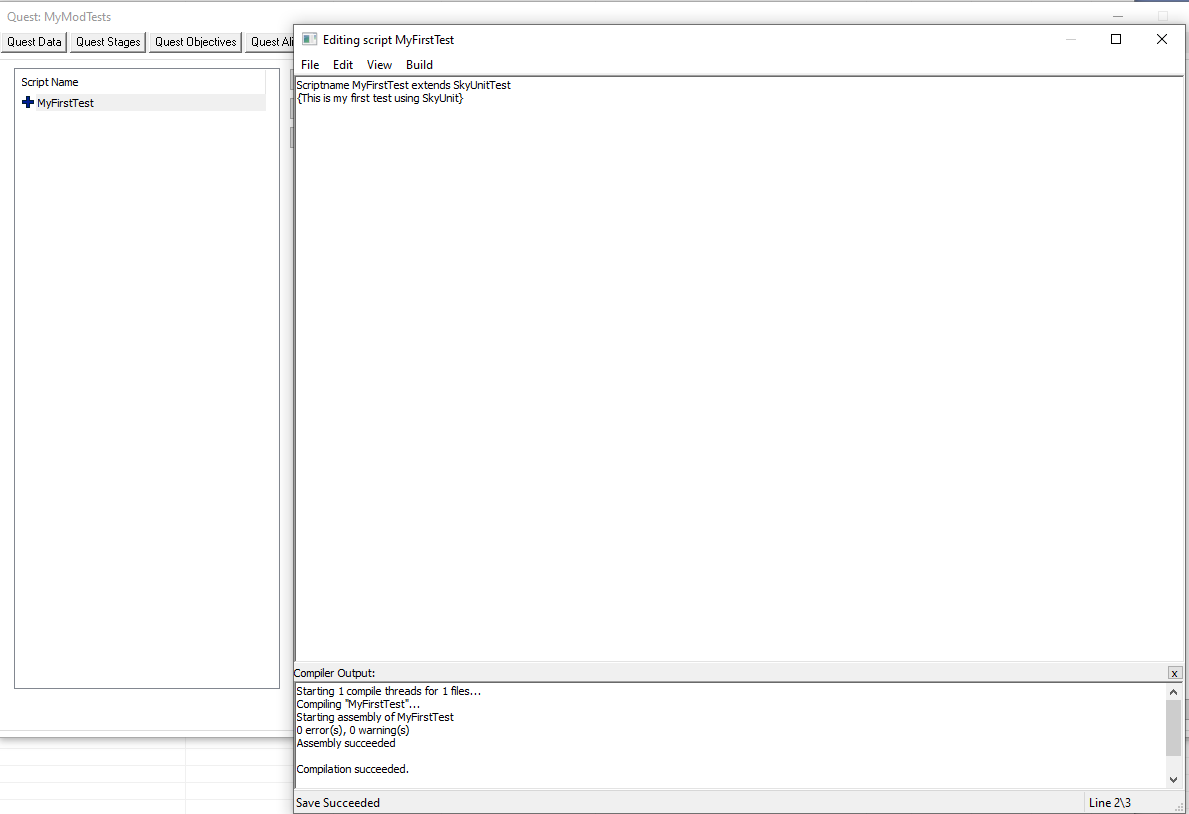
Compile Script
Use Ctrl-S to compile the script and make sure it compiles OK!
If you get an error like variable JMap is undefined
then make sure you installed JContainers
If you get an error like variable SkyUnitTest is undefined
then make sure you installed SkyUnit
Open Test Code in Text Editor
Do not try to write your tests in the Edit Source area of Creation Kit.
Open your newly created mod in Visual Studio Code or whichever editor you use for Papyrus scripts.
To be effective writing tests, you MUST HAVE CODE COMPLETION.
You could try to use SkyUnit without code completion, but it is highly recommended to use a modern editor with Papyrus support.
Add Tests
Time to add tests!
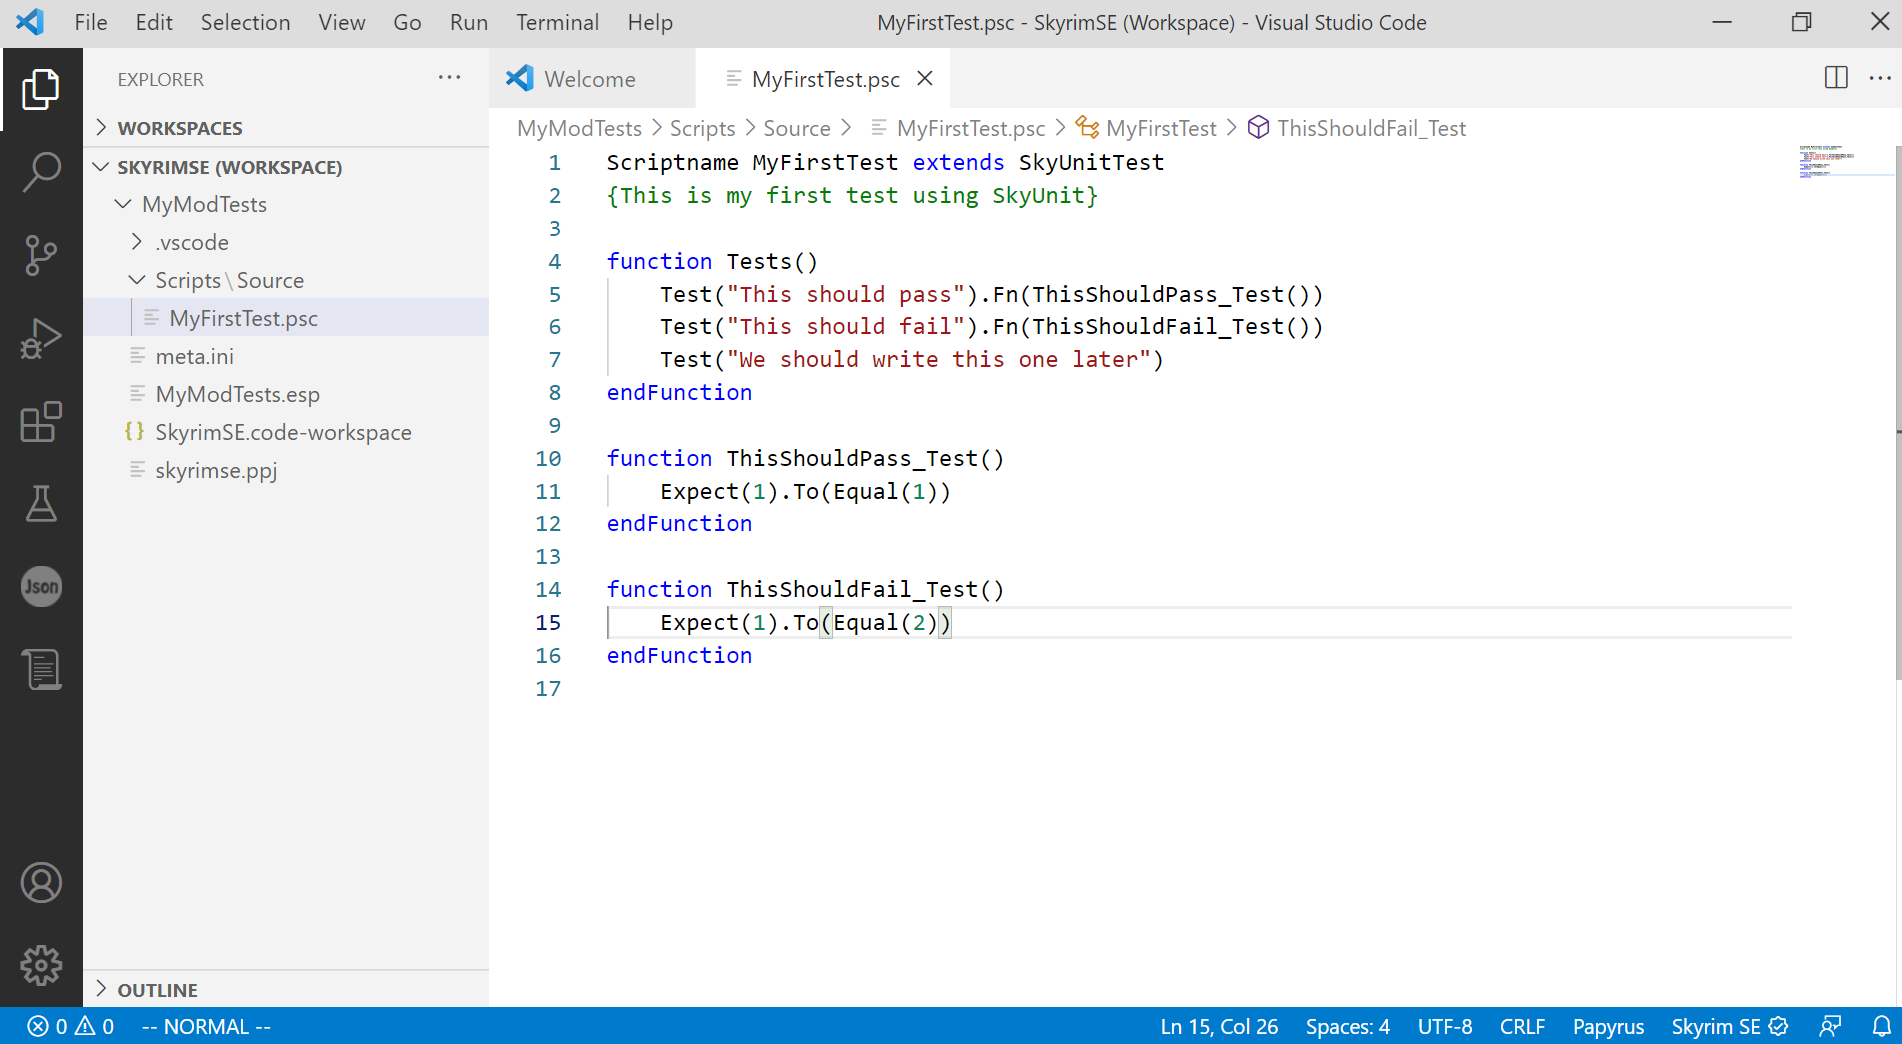
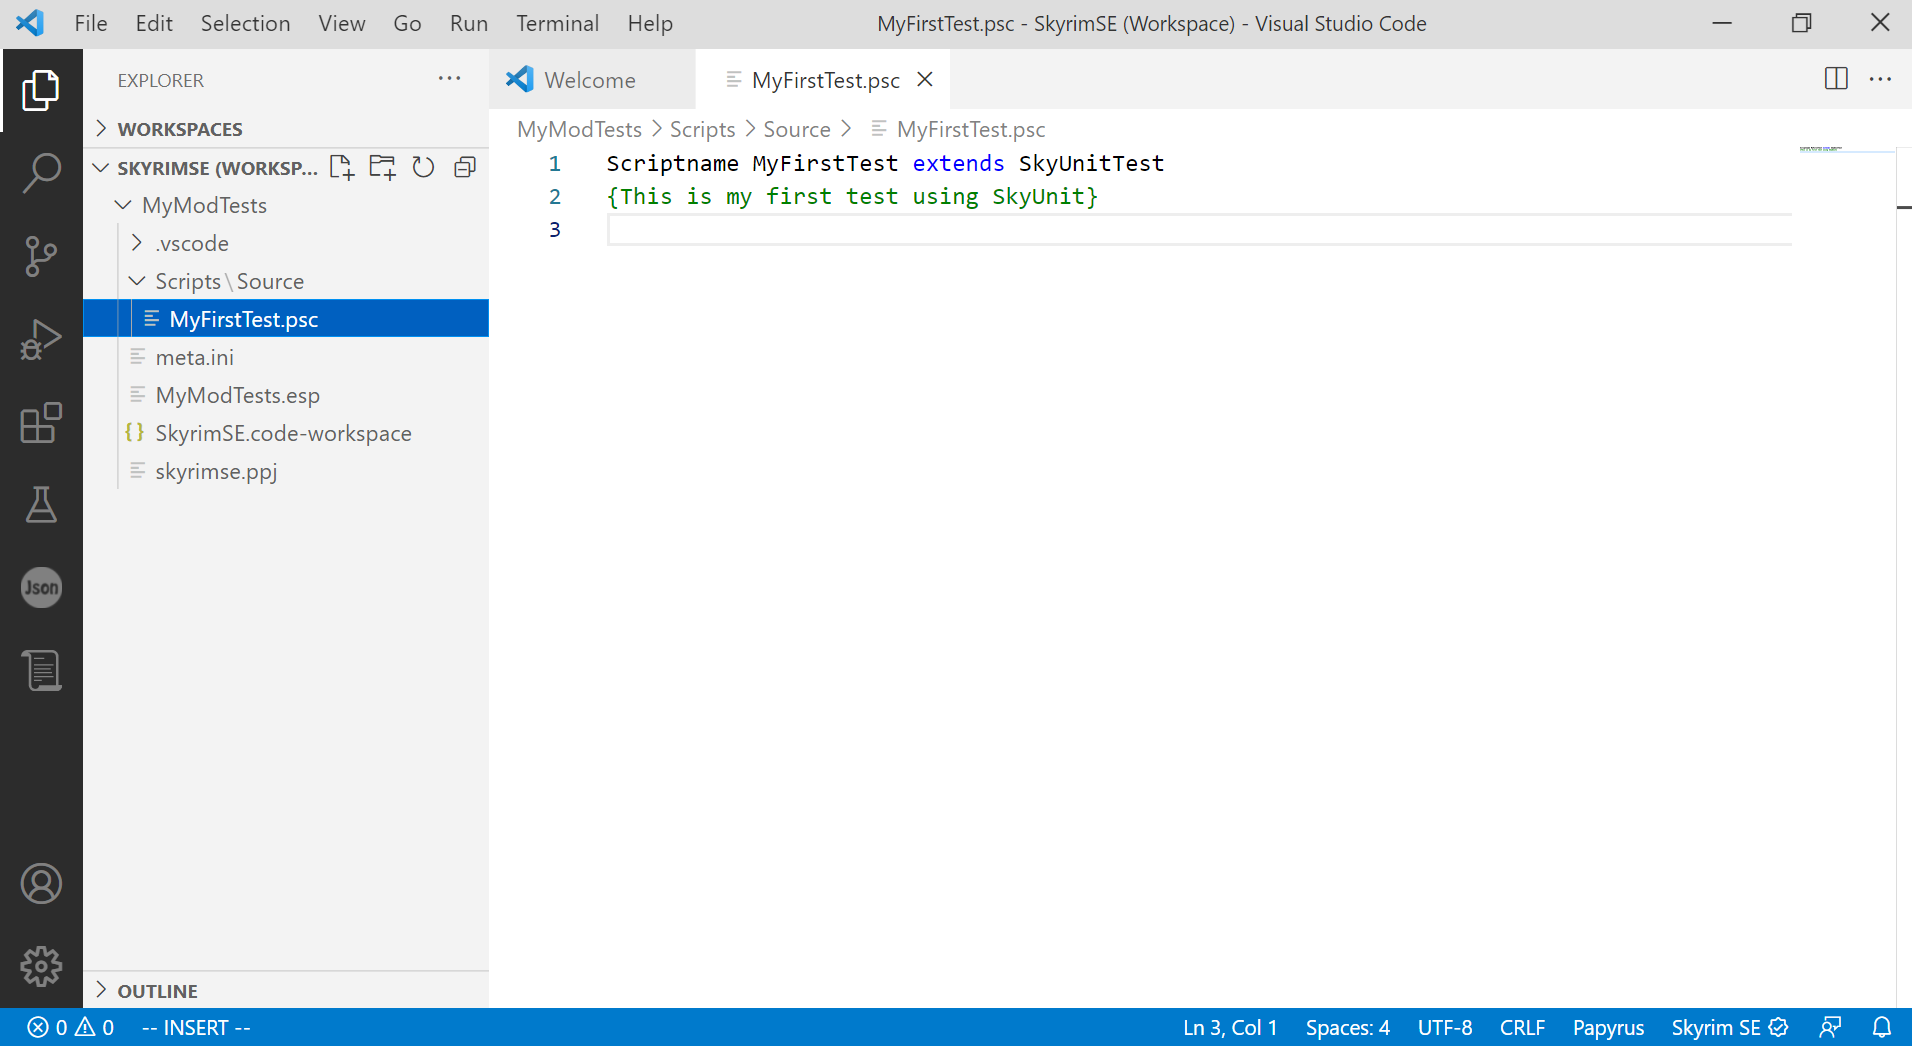
scriptName MyFirstTest extends SkyUnitTest
{This is my first test using SkyUnit}

; # Create a Tests() function to define all of your tests
function Tests()
    ; # Define each test case using Test()
    ; # and connect it to a function where the test
    ; # is defined using Fn([test function]())
    Test("This should pass").Fn(ThisShouldPass_Test())

    ; # Add another test case
    Test("This should fail").Fn(ThisShouldFail_Test())

    ; # This test case has no connected function.
    ; # It will show up in the SkyUnit UI as a "pending" test.
    ; # Useful for tracking TODO lists of tests.
    Test("We should write this one later")
endFunction

function ThisShouldPass_Test()
    Expect(1).To(Equal(1))
endFunction

function ThisShouldFail_Test()
    Expect(1).To(Equal(2))
endFunction
Now save and compile!
Run Test
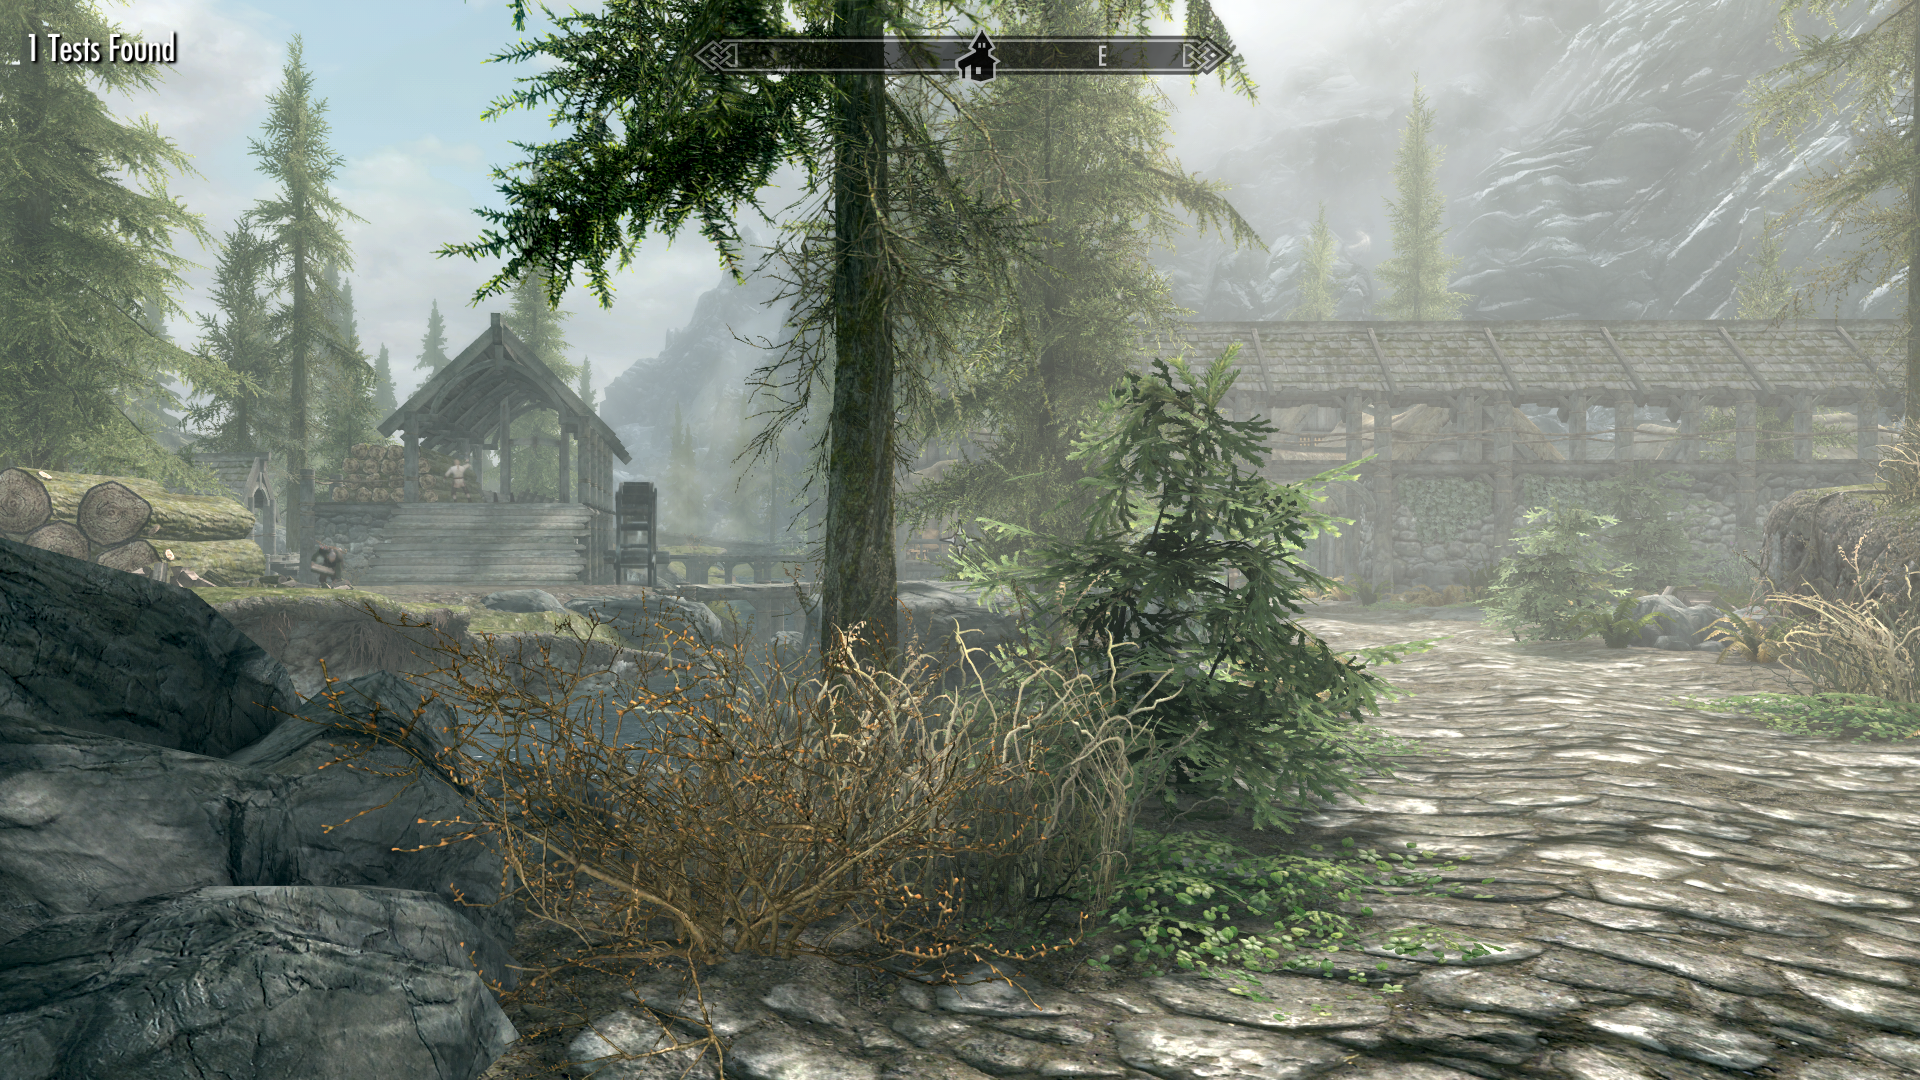
Time to boot up the game!
Make sure you have your new
.espcontaining the tests included.
When you boot up the game and coc [somewhere], you should see a 1 Tests Found notification!
If you see this, you will automatically have a Lesser Power equipped (which opens up the SkyUnit UI)
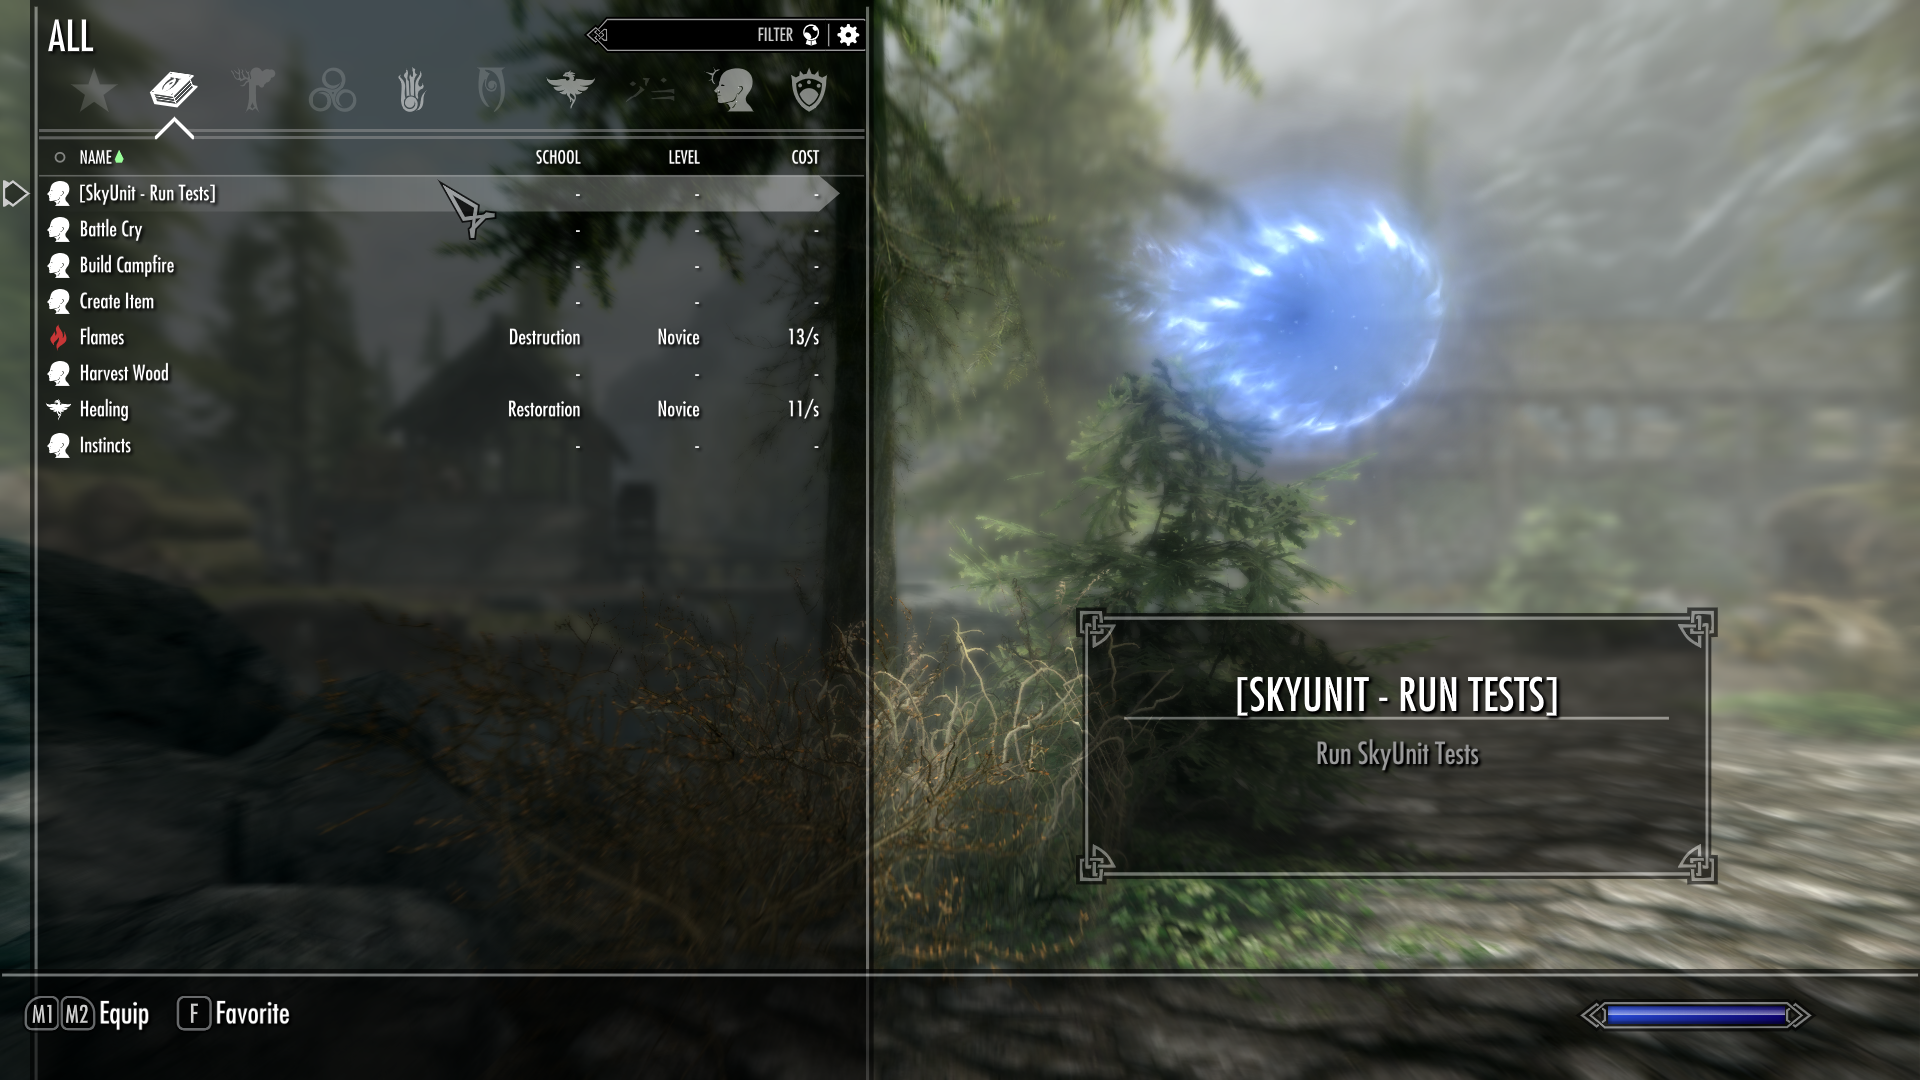
SkyUnit UI
You can open the SkyUnit UI using the [SkyUnit - Run Tests] power.
This should be automatically equipped, so simply press Z to open the SkyUnit UI menu.
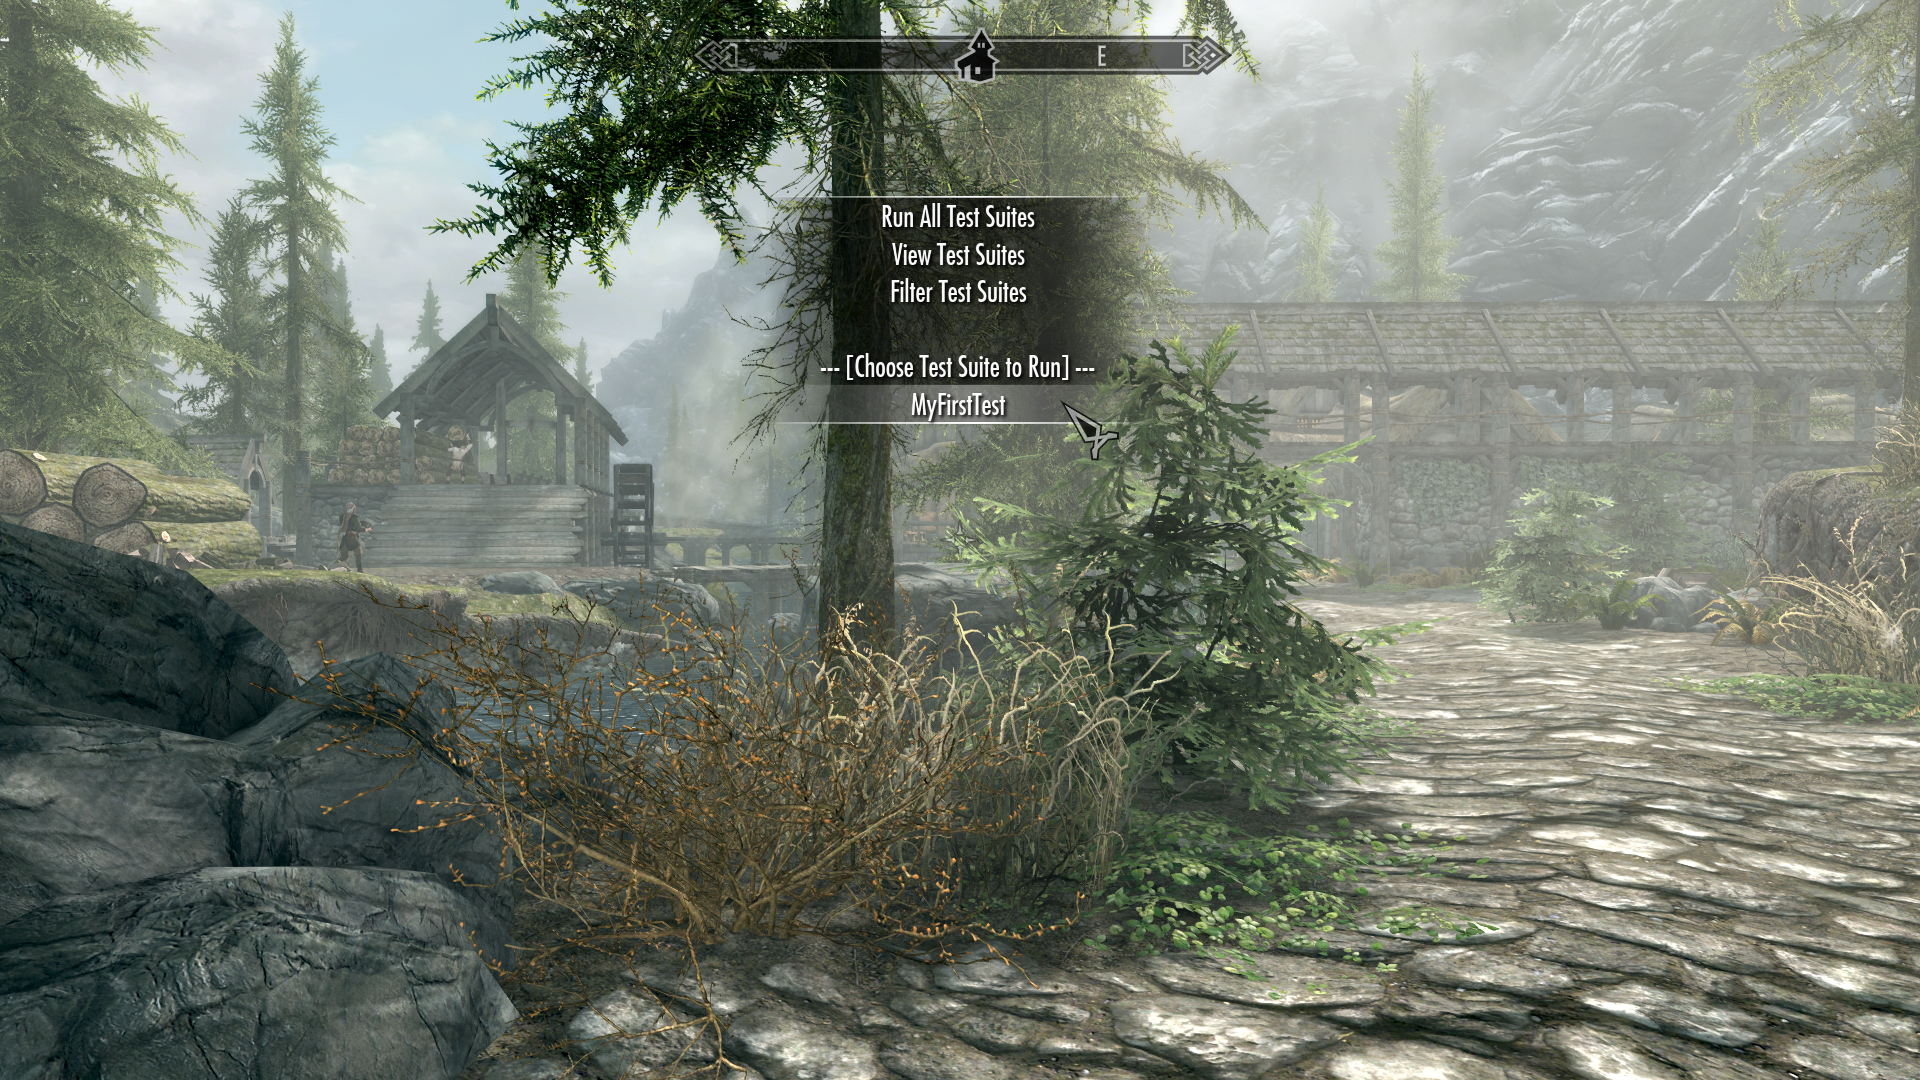
Main Menu
From the main menu, you can run all Test Suites (all discovered test scripts) or click on an individual test suite to run it.
Note: if you know the name of a single test suite you want to run,
you can tap theFkey (for filter) to filter test suites.
Just type part of the test suite name and it will run.
This is useful if you have multiple test suites defined.
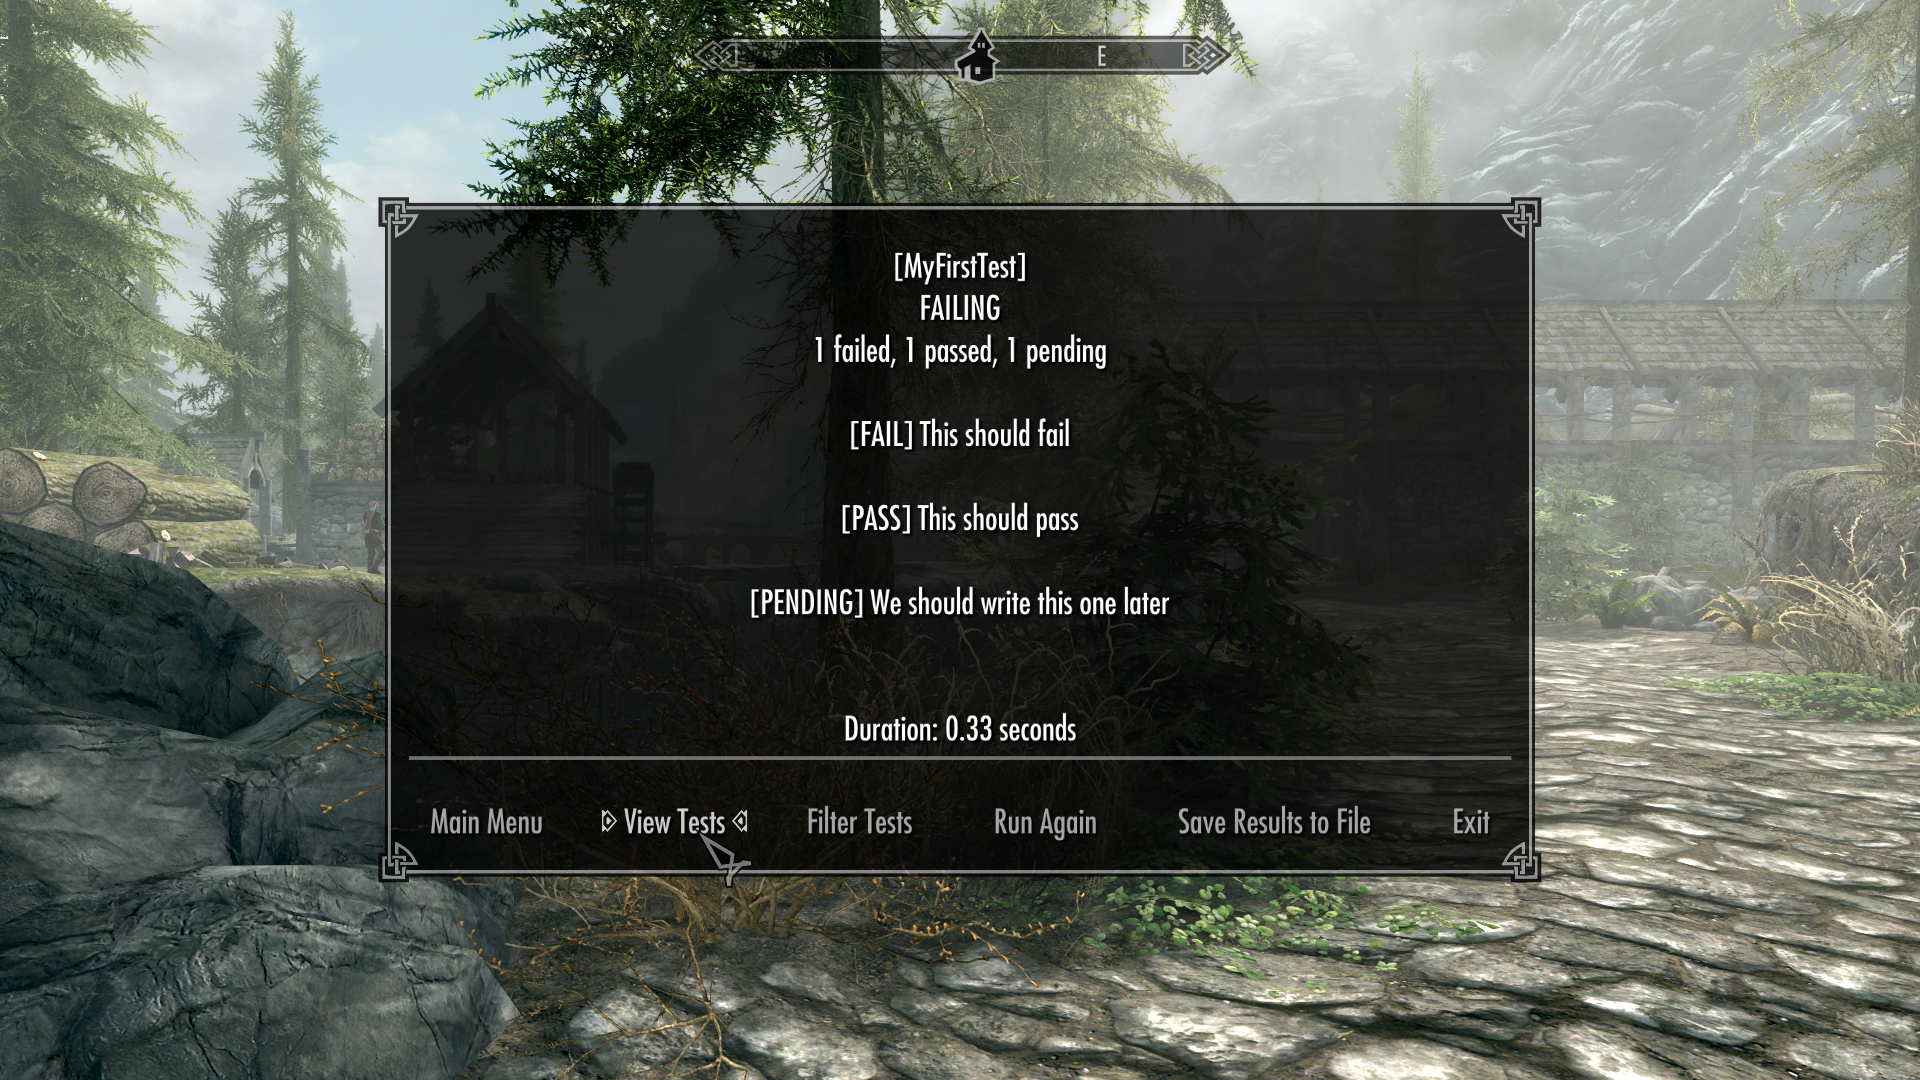
Test Suite Results
After the test suite runs, you can see the results of each test!
If you want to see details about an individual test, e.g. see the failure messages in a failed test, click View Tests.
Note: sometimes not all tests will show up in this dialog due to text length limitation. In these cases, use
View Teststo see a full list of tests and view individual failed tests.
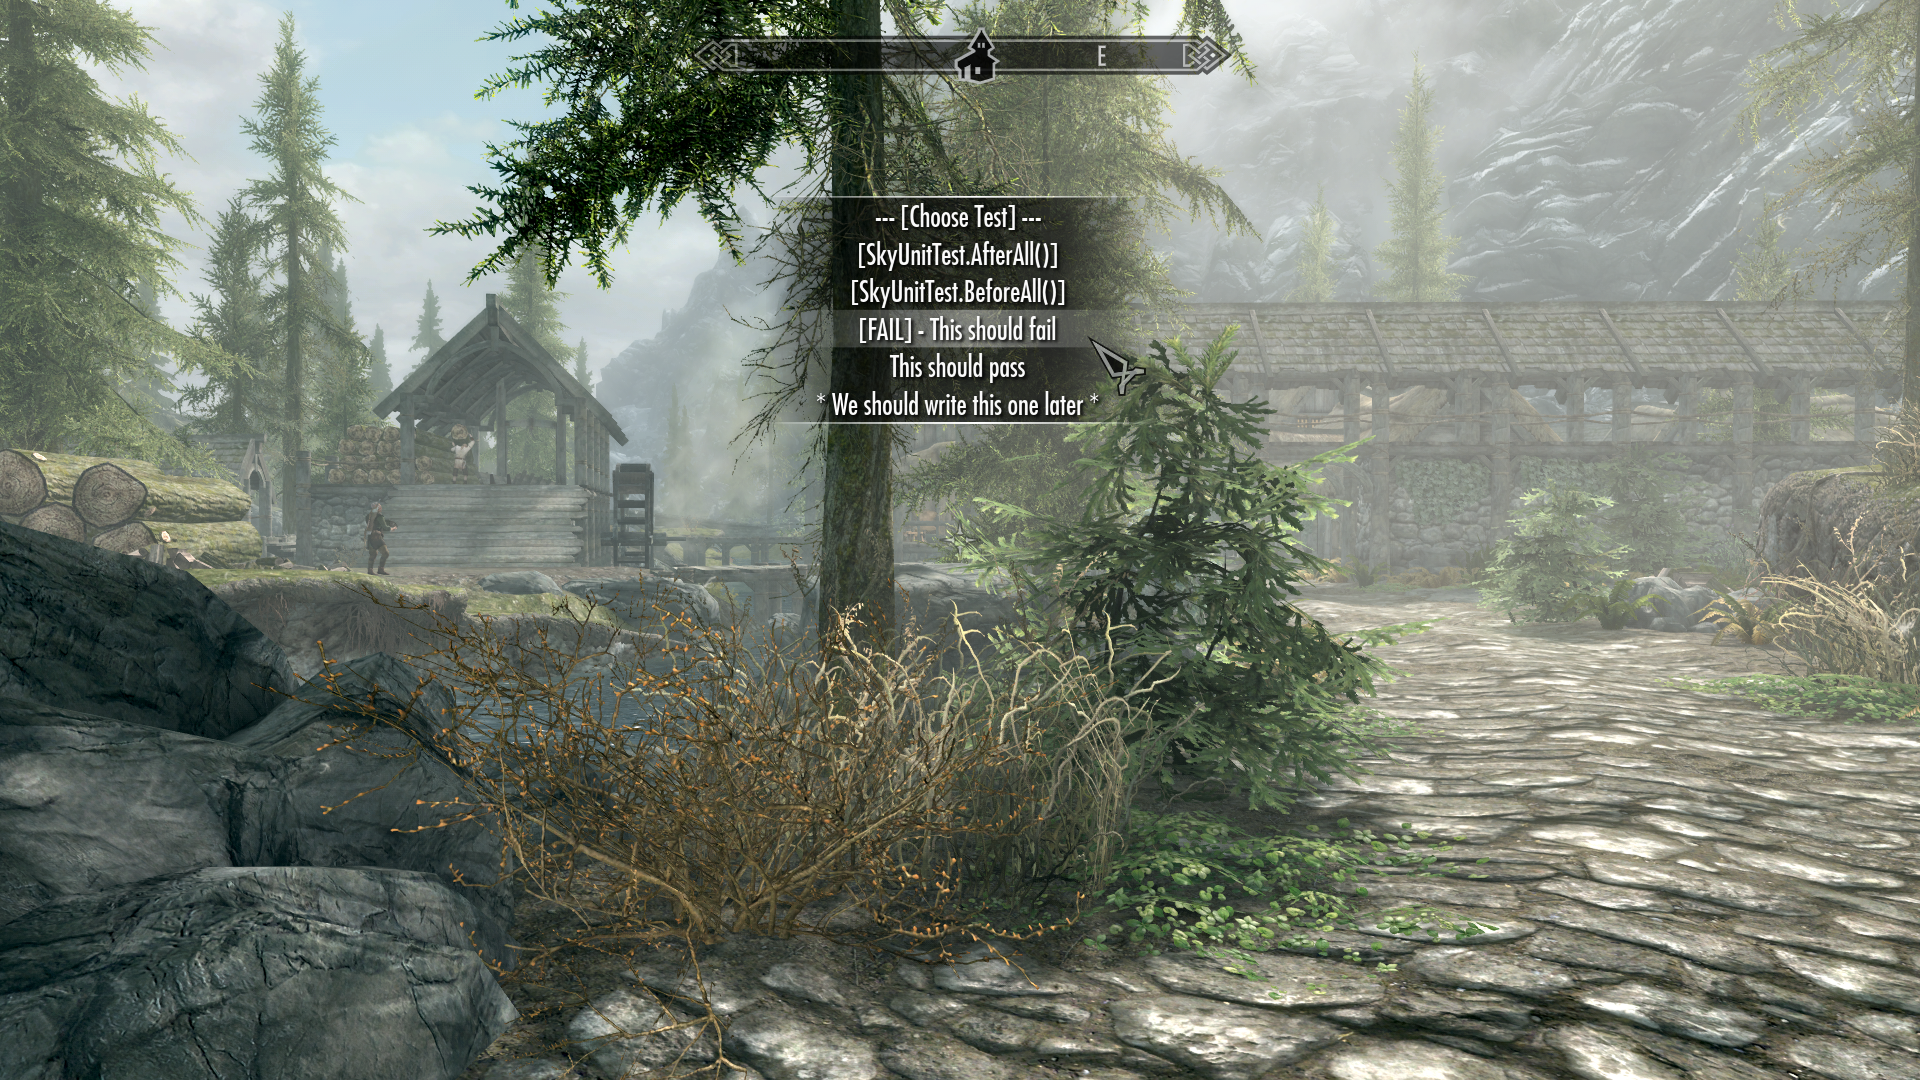
View Individual Test
You can choose individual tests to view.
Failed tests are highlighted with [FAIL] and pending tests are highlighted with *
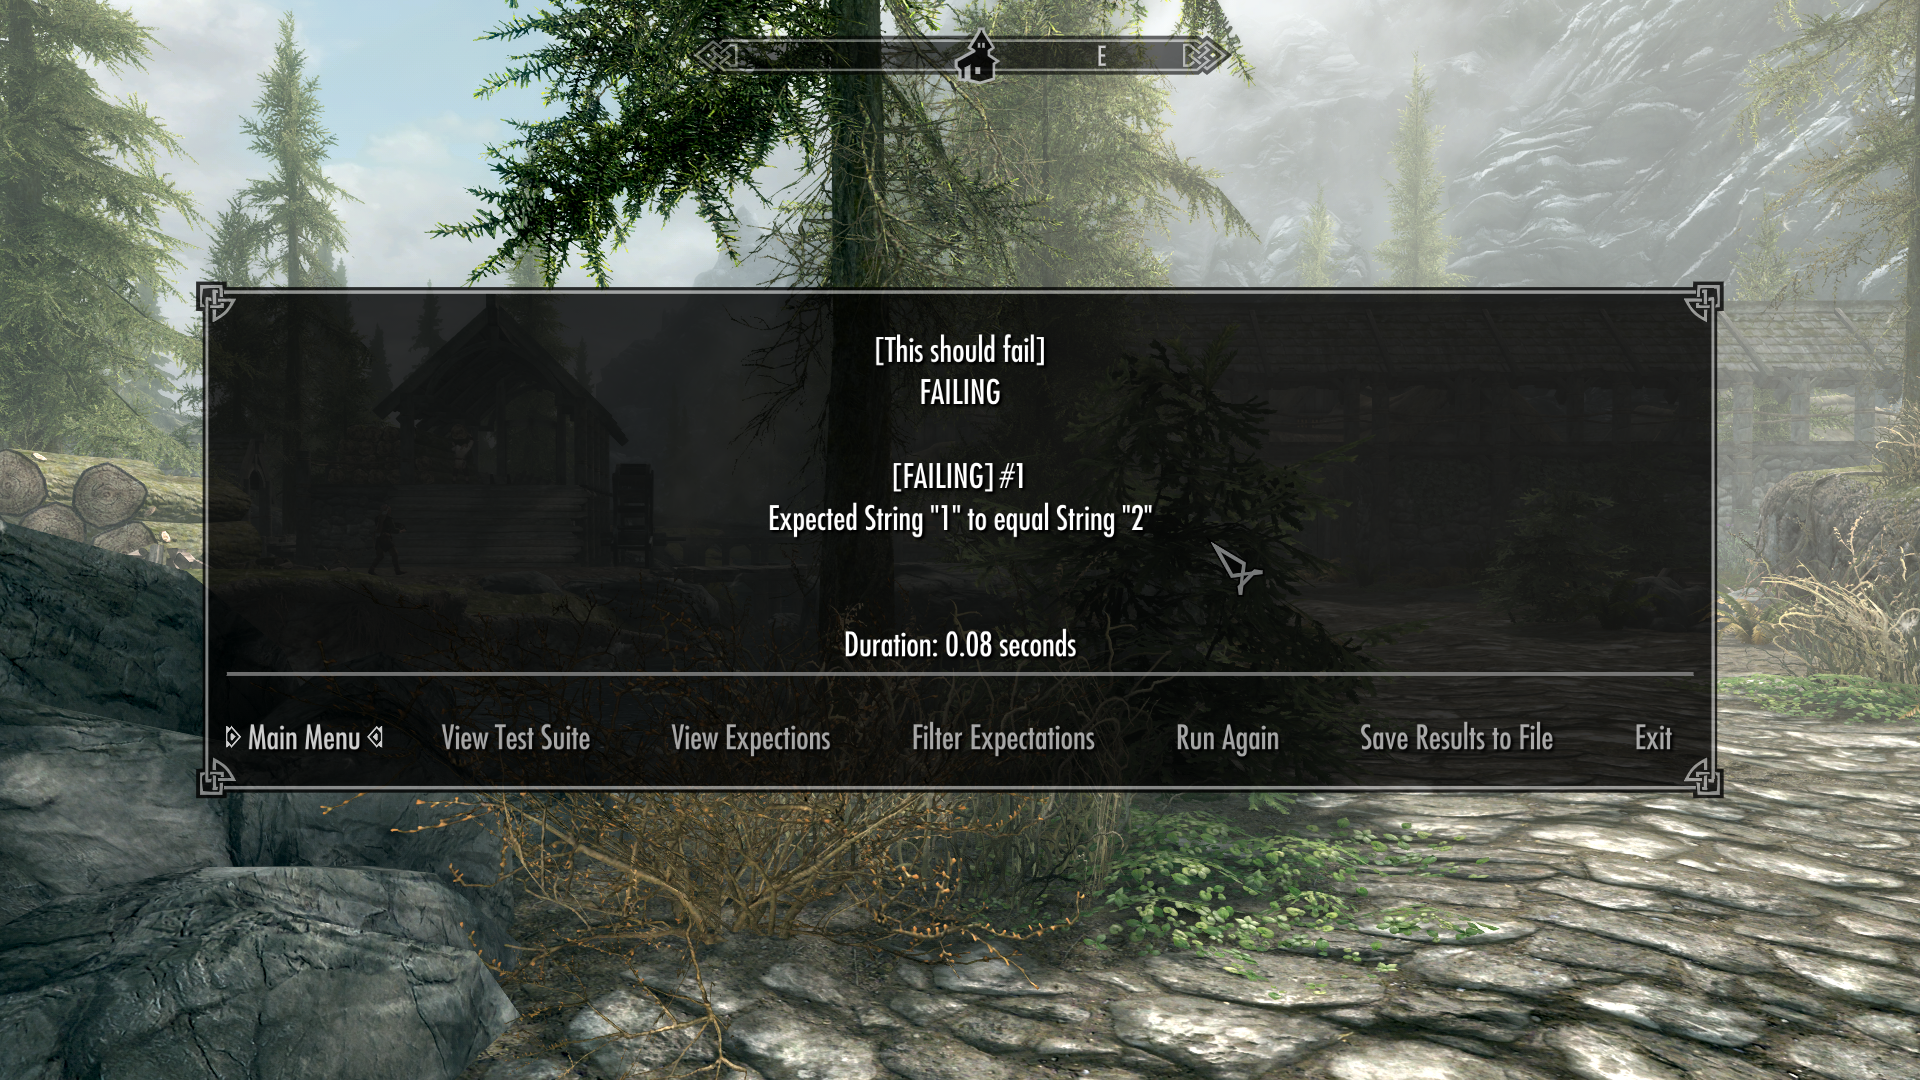
Test Details
Viewing a test will show you all of the failing expectations and their failure messages.
Note: sometimes not all expectations will show up in this dialog due to text length limitation. In these cases, use
View Expectationsto see a full list of expectations and view individual failed expectations.